This is a mini-series of blog posts about data integration to help our users and Marketplace vendors onboard. The first two are technical, while the third can be done by pretty much anyone.
- How to connect data to Streamr in 5 minutes
- Three patterns for integrating your data to Streamr
- Creating a product for the Streamr Data Marketplace
In this tutorial you will learn how to send real-time data to Streams that exist on the Streamr Network. You will use the UI to create a Stream, then send data points to it using the Streamr JavaScript client library. We’ll also take a look at how to do the same from any language by making the API calls directly.
Table of Contents
Understanding Streams and events
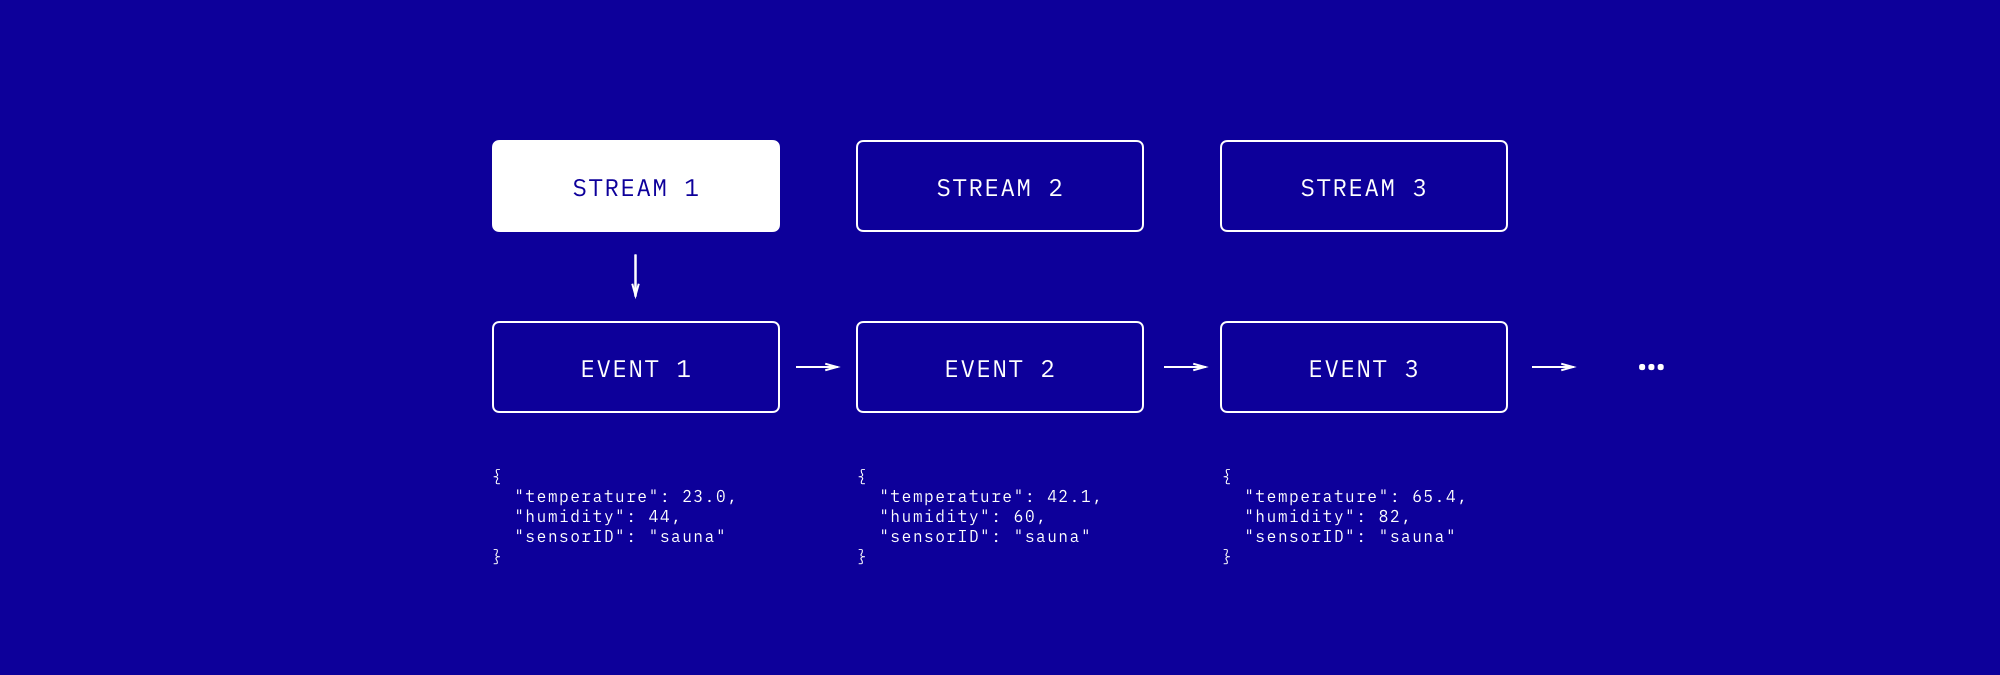
Data in Streamr consists of Streams (topics), which contain an ordered sequence of events (timestamped data points). Event payloads are JSON objects, or in other words, a set of key-value pairs. Here’s an example event with some sensor readings:
{ "temperature": 65.4, "humidity": 82, "sensorID": "sauna"}Creating your first Stream
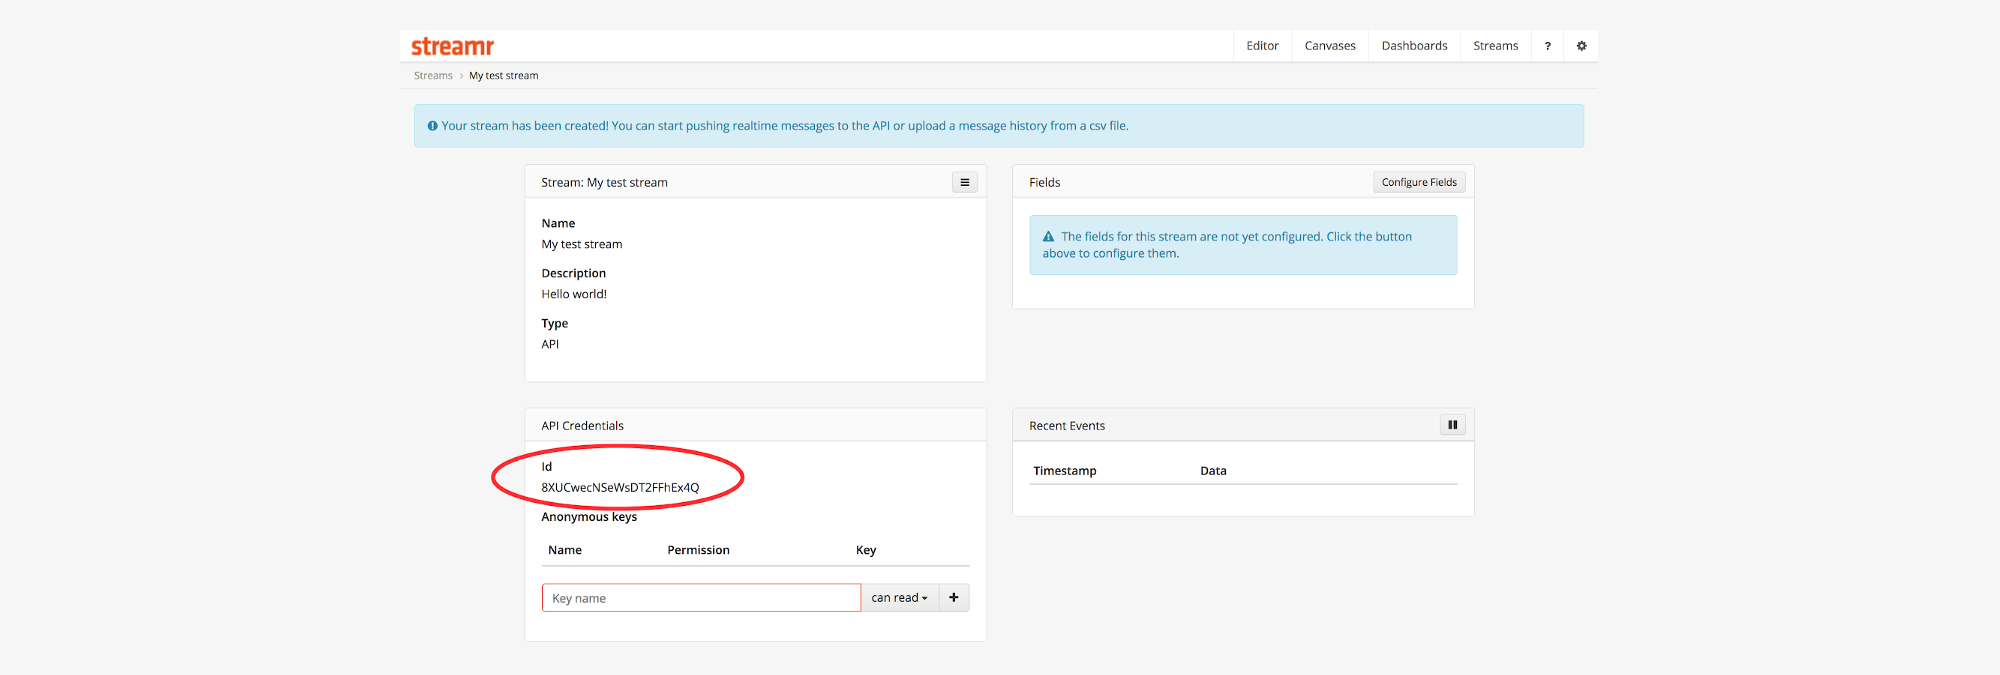
Make note of where to find your Stream ID, circled above in red. You will need it soon.
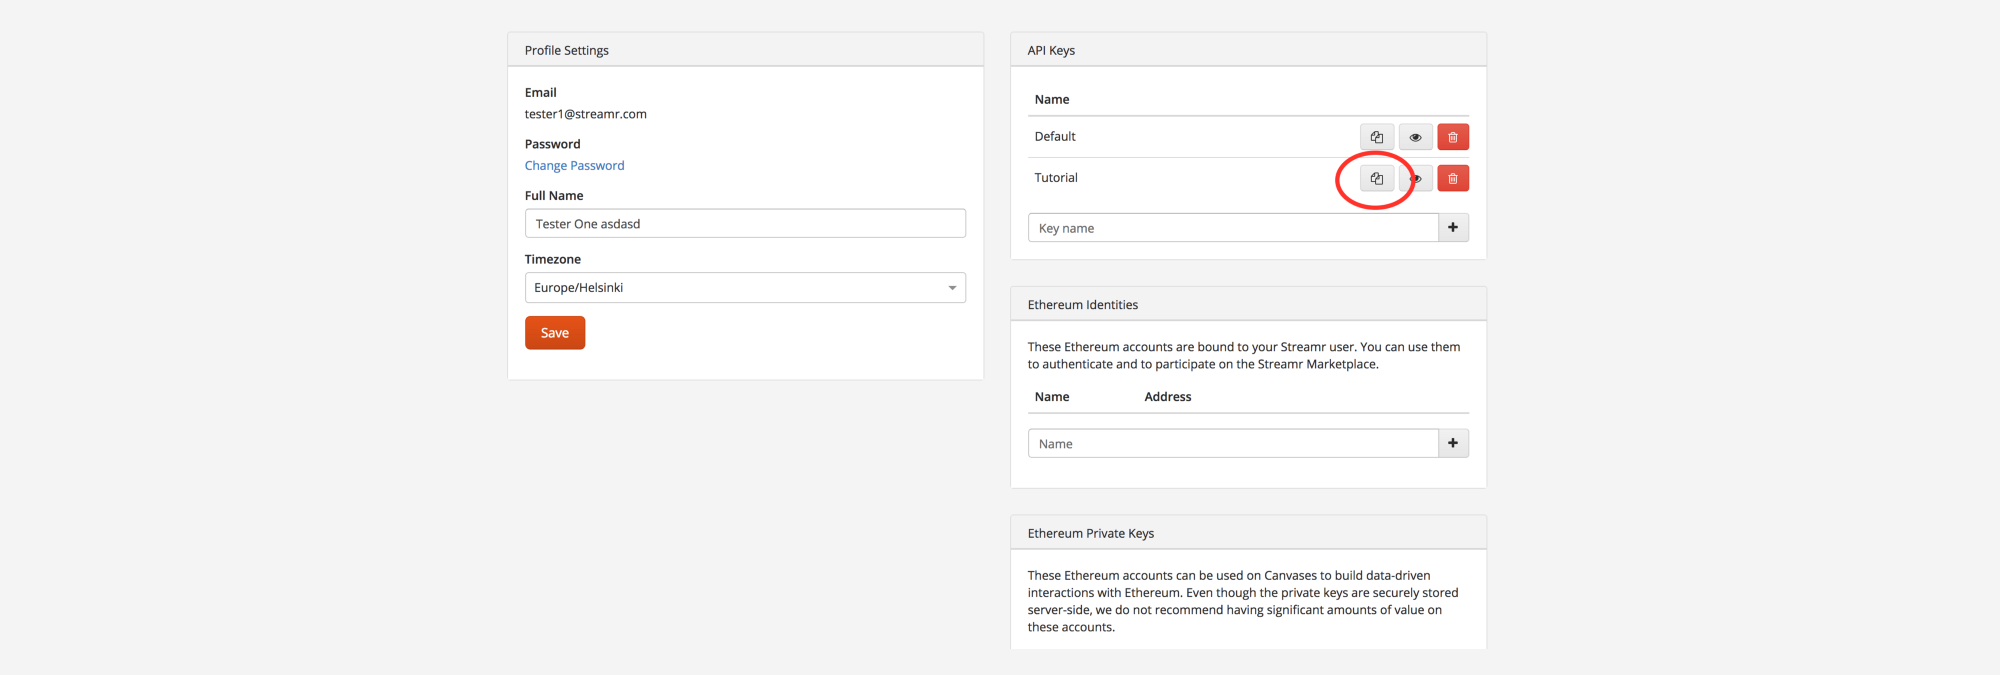
Finding your API keys
Before you can produce events to your shiny new Stream via the API, you need a key to authenticate to the API:
Producing events to Streams
The easiest way to interact with the API is to use the JavaScript client, which works in node.js as well as the browser. Client libraries for other languages are in the roadmap.
You can also try it locally in your browser. Just open this JS Bin, and replace MY-STREAM-ID and MY-API-KEY with your Stream ID and API key. Your browser will start producing data to your Stream!
You should see “Sent successfully: …” messages in JS Bin, and as long as the JS Bin is open, new data points keep appearing in real time under the “Recent Events” section on your Stream page:
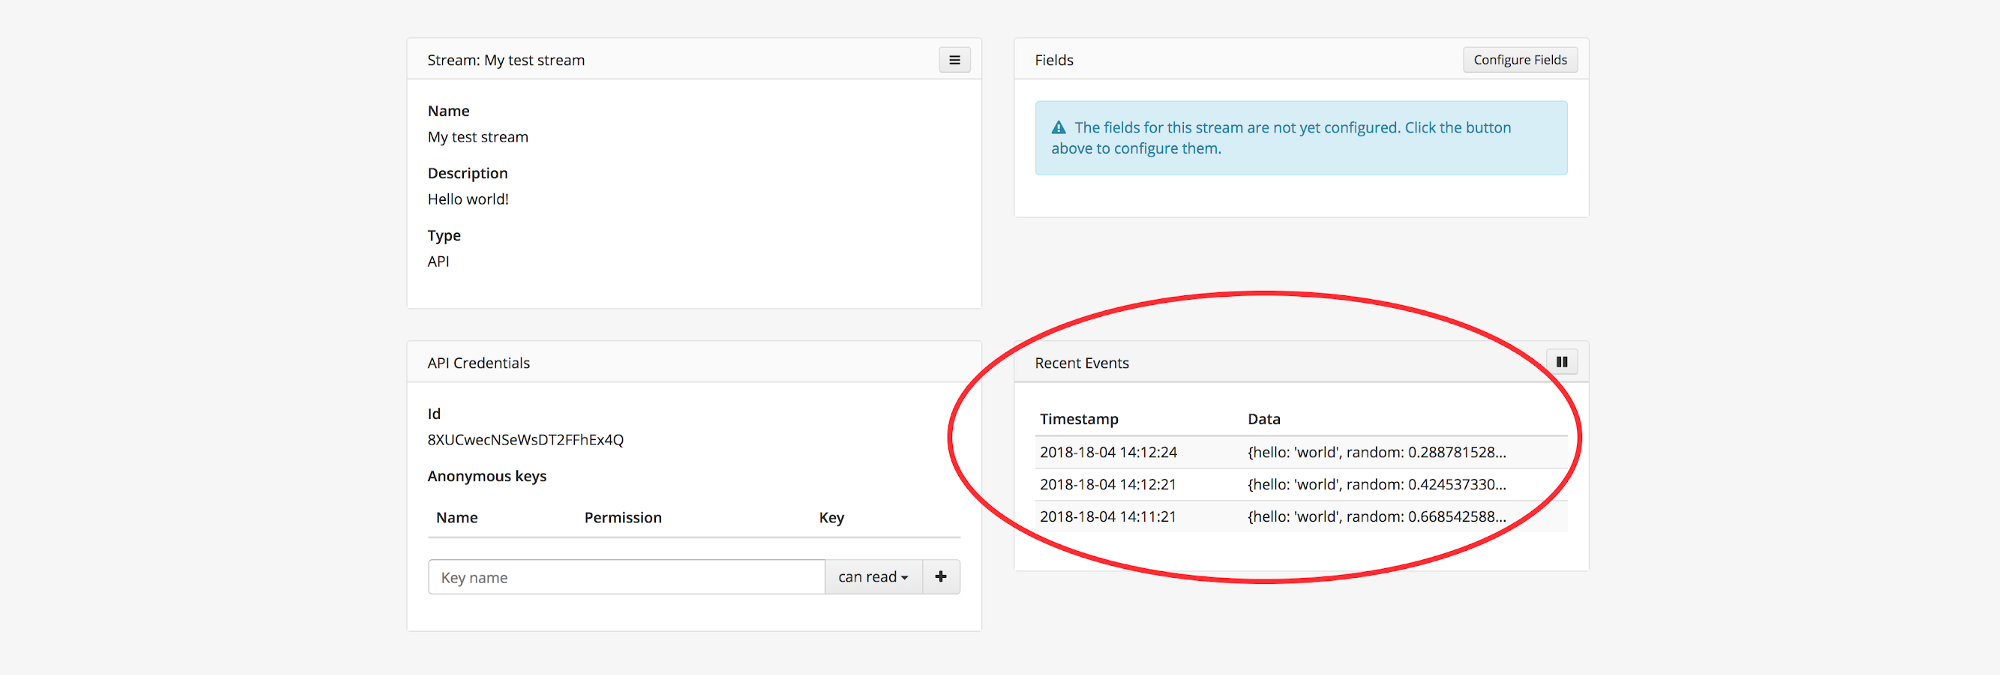
Congratulations, you are successfully sending data to the Stream! Even though the JS Bin example runs locally in your browser, go ahead and delete the “Tutorial” API key on the Profile page, just in case.
Using streamr-client in node.js
The client works similarly in node.js. In your project, first install the client library:
npm install --save streamr-clientThen, let’s create a little node.js script which sends an event to your Stream (again, replace MY-STREAM-ID and MY-API-KEY with your Stream ID and your API key):
const StreamrClient = require('streamr-client')const STREAM_ID = 'MY-STREAM-ID'const API_KEY = 'MY-API-KEY'// Create the client and give the API key to use by defaultconst client = new StreamrClient({ apiKey: API_KEY})// Here is the event we'll be sendingconst msg = { hello: 'world', random: Math.random()}// Produce the event to the Streamclient.produceToStream(STREAM_ID, msg) .then(() => console.log('Sent successfully: ', msg)) .catch((err) => console.error(err))Note that the library requires node.js ≥ 8. When you run the above, a new event should immediately appear under “Recent Events” on your Stream page!
What if my app is not in JavaScript?
You can interact with the Streamr API using any HTTP library of your choice. You will find all the details in the API docs, but here’s a brief rundown:
- You’ll be making HTTP POST requests to a URL, which contains your Stream ID:
https://streamr.network/whitepapers/api/v1/streams/MY-STREAM-ID/data- The body of the request will be your data payload in JSON
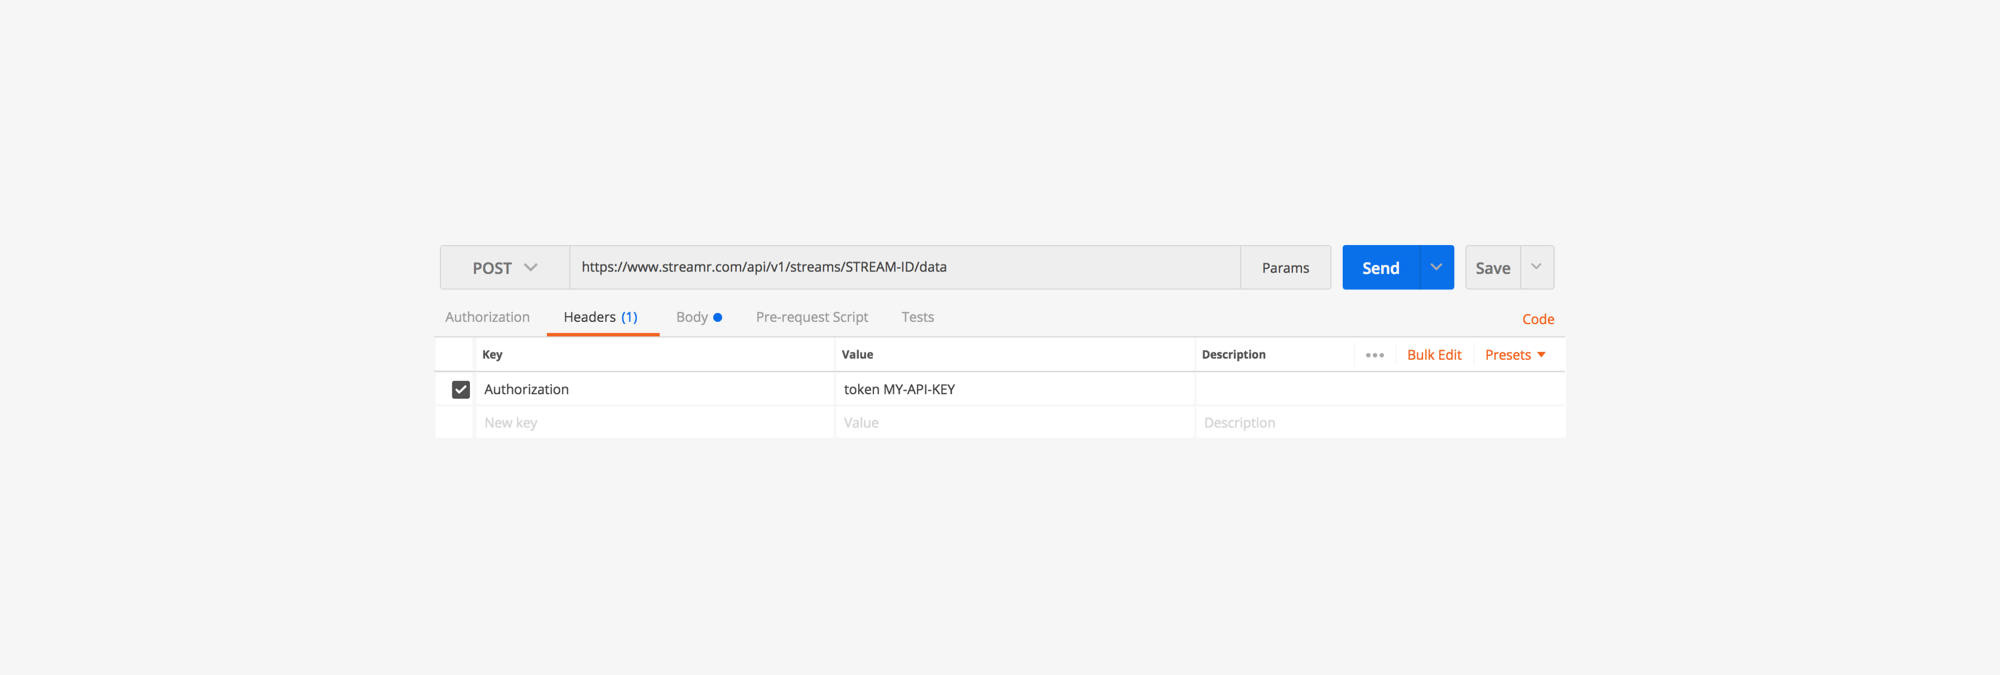
- Add your API key to the HTTP headers as follows:
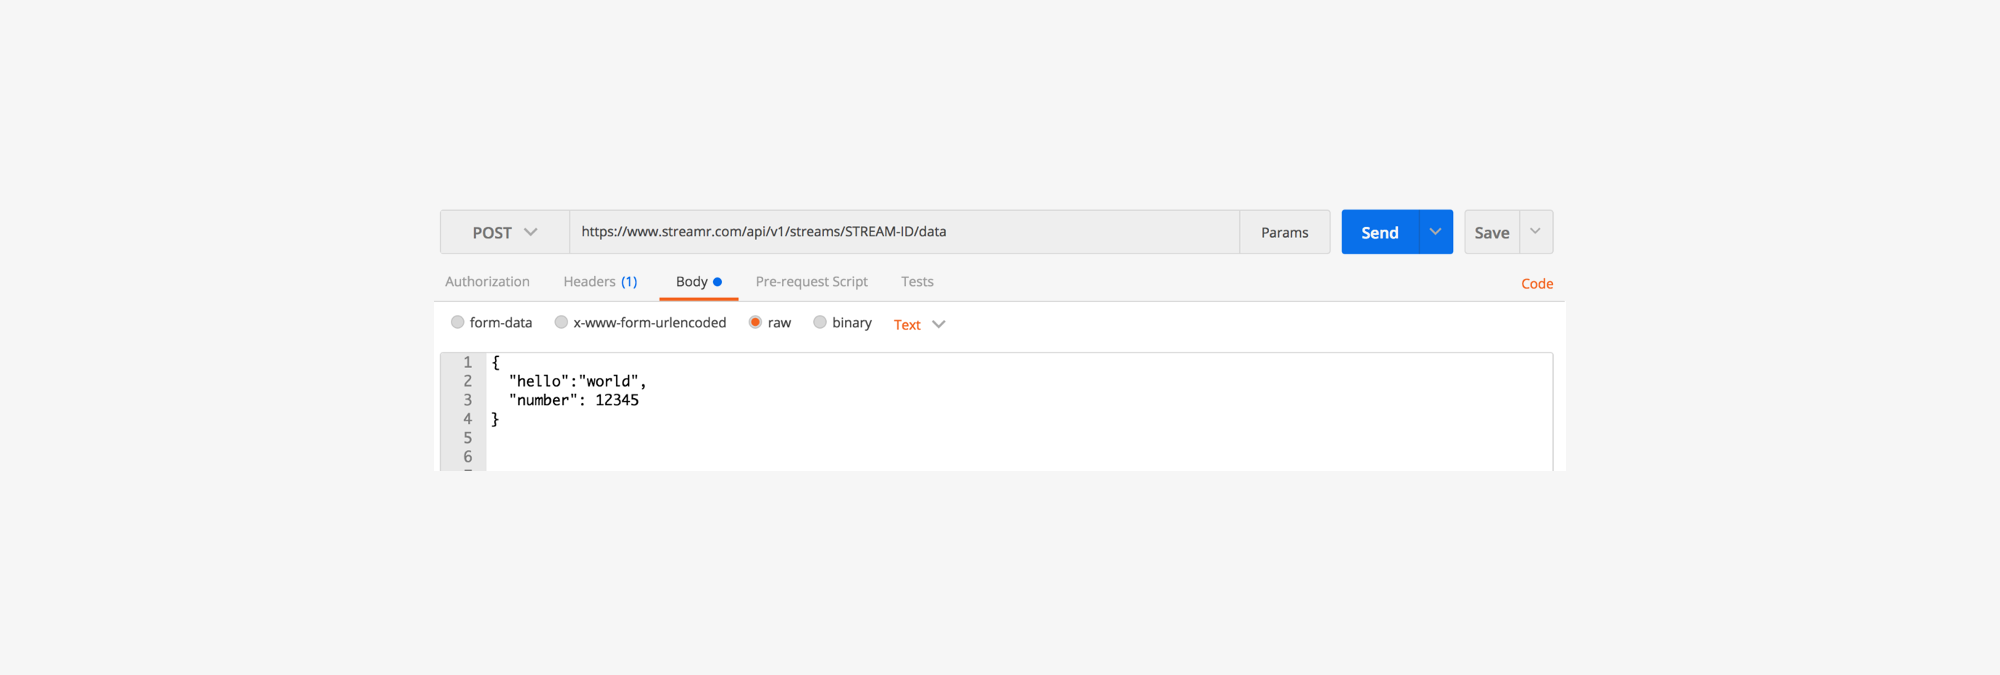
Authorization: token MY-API-KEYThis is how a test request would look in the fabulous Postman app, with the URL and Authorization header set:
And the JSON event as the “raw” request body:
You can even send an event with curl from the command line! Here’s an example:
curl -i -X POST -H “Authorization: token MY-API-KEY” -d “{\”hello\”:\”world\”}” https://streamr.network/whitepapers/api/v1/streams/MY-STREAM-ID/dataBonus: configure the Stream
To make it easier for yourself and others to use the Stream, you can set up its field configuration. This is optional metadata that describes the structure of the events, i.e. which fields are present in the payloads. The fields can be autodetected based on the data you already produced.
Click on this button on your Stream page:
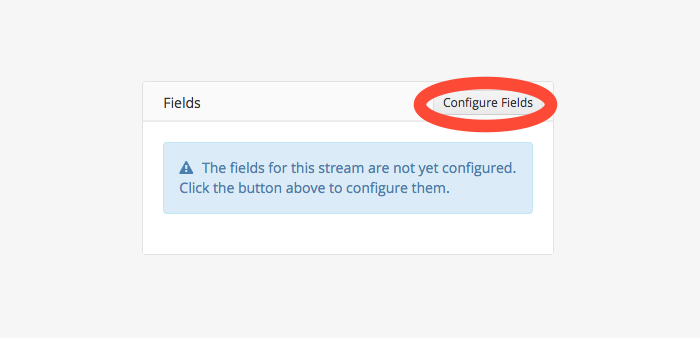
Then press the “Autodetect” button. You should see the fields in your most recent event appear. Press “Save”. Done! Now the Stream can be used to build things in the Editor, for example.
What Next?
Now that you’ve learned the basics, the next post will explain three different patterns for data integration:
1. Pushing from the source
2. Bridging from a streaming source
3. Bridging by polling a source
What you accomplished in this tutorial was closest to option 1, which assumes you have access to new data points in a piece of software under your control. Sometimes this is not the case — for example, your data might first force itself into a device vendor’s cloud, from where you need to fetch it and then forward it to Streamr. This kind of scenario will be explored in the next post.
Finally, in the third post, we’ll take a look at how to turn the Streams you have created into Products on the Streamr Marketplace. This enables you to either share your Streams for free or license them to others for a payment.
If you encounter any problems, feel free to flag one of our mods on our Telegram, and Reddit channels.